Dashboard edit mode
Edit mode lets you customize the dashboard structure and content. From this mode, you can create and organize menu pages, add widgets, configure their data, and change their layout.
Entering edit mode
Open the user menu in the top bar (1) and select Edit UI (2). If you manage multiple dashboards, first check the dashboard selected in the Dashboard field.

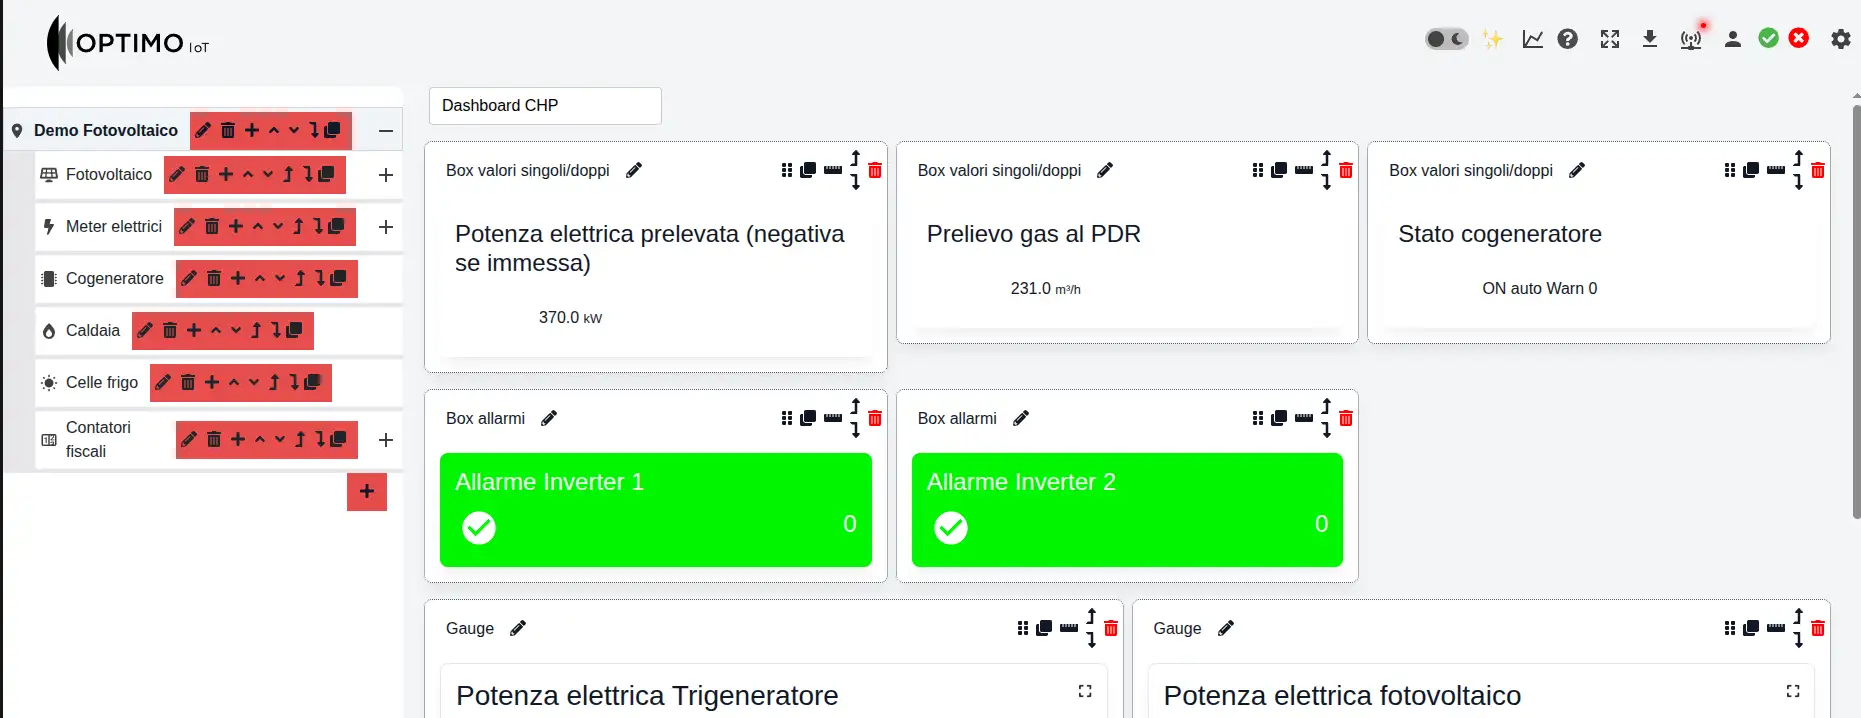
In edit mode, the interface displays:
- management controls beside the entries in the side menu;
- editing controls in each widget header;
+buttons for adding pages and widgets;- a green check mark for confirming changes and a red
Xfor cancelling them.
Managing menu pages
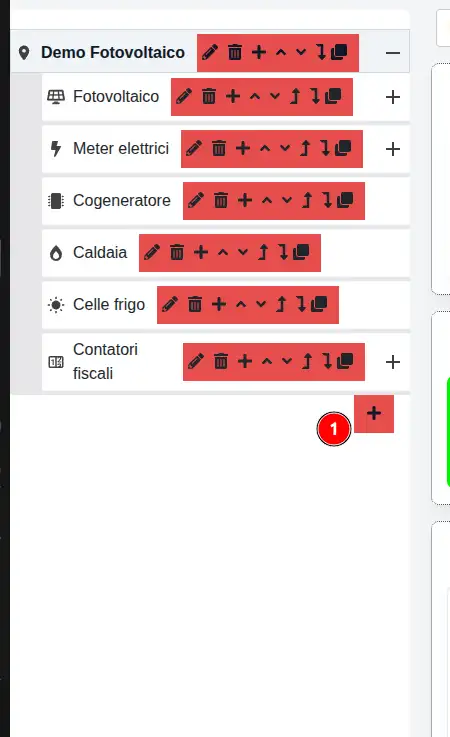
The side menu represents the hierarchy of the dashboard pages. The + button at the bottom of the menu (1) creates a new top-level entry.
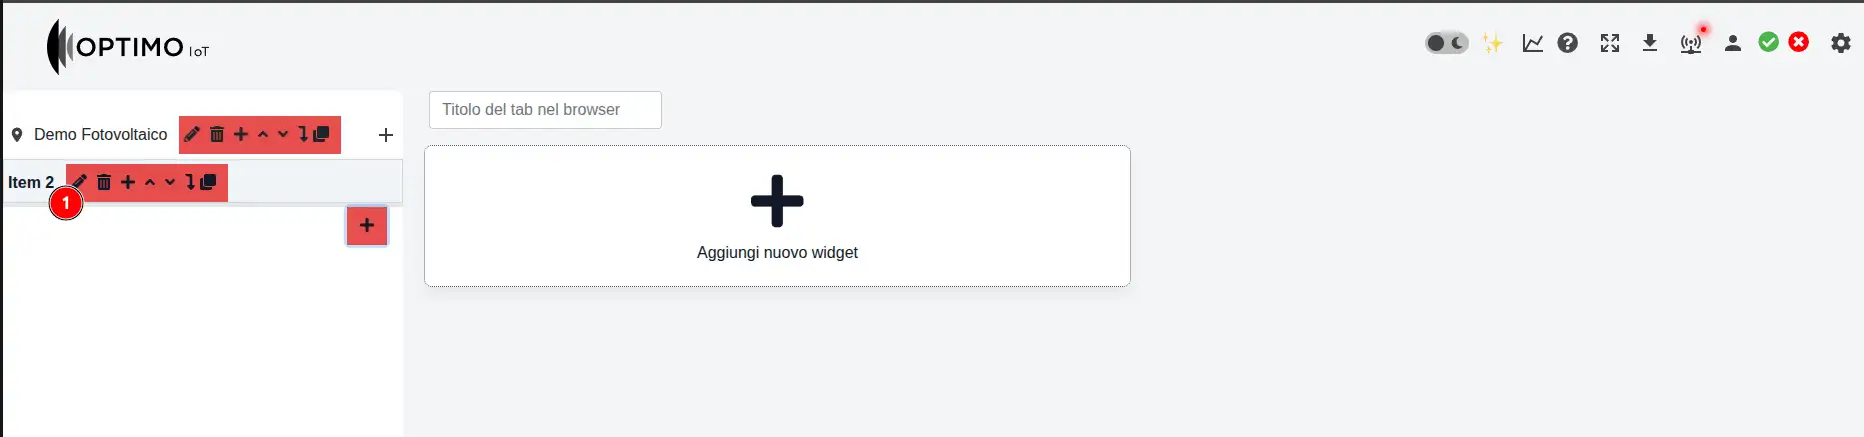
The new page is added to the menu and initially contains no widgets. Use the pencil beside the new entry (1) to configure it.
Configuring a menu entry
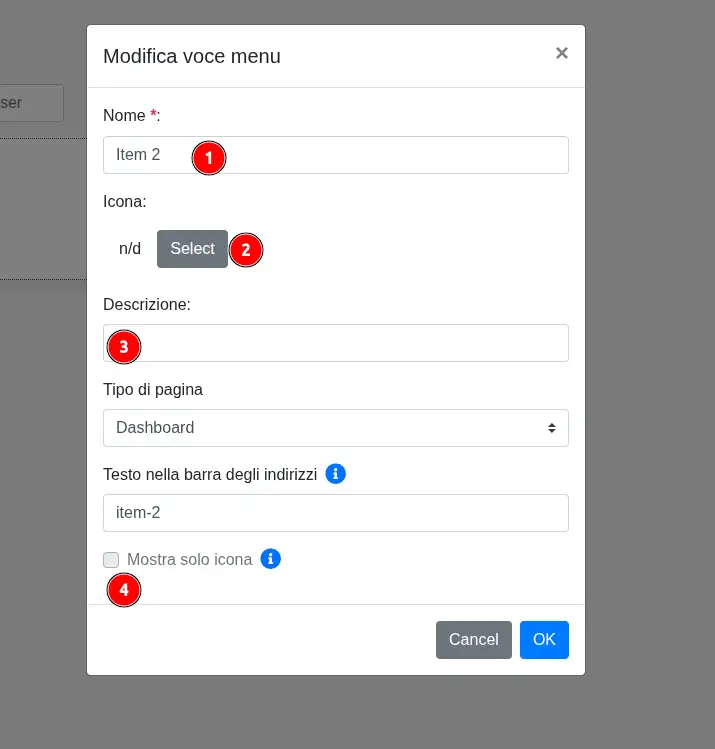
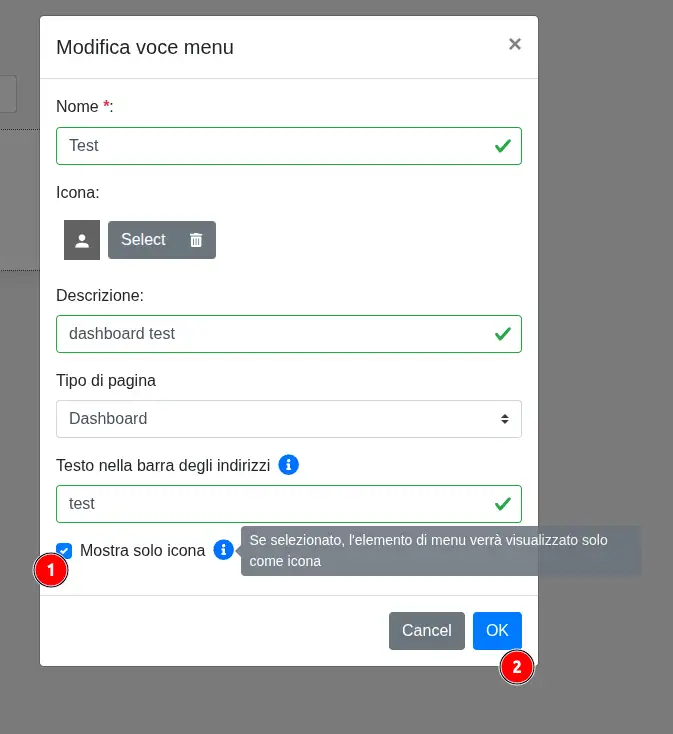
In the Edit menu item window, you can set:
- Name: the text displayed in the menu;
- Icon: the symbol displayed next to the name;
- Description: a short description of the page;
- Show icon only: hides the name and displays only the icon in the menu.
The Page type field defines the content associated with the entry. To create a page containing widgets, select Dashboard. Text in the address bar defines the readable part of the page address.
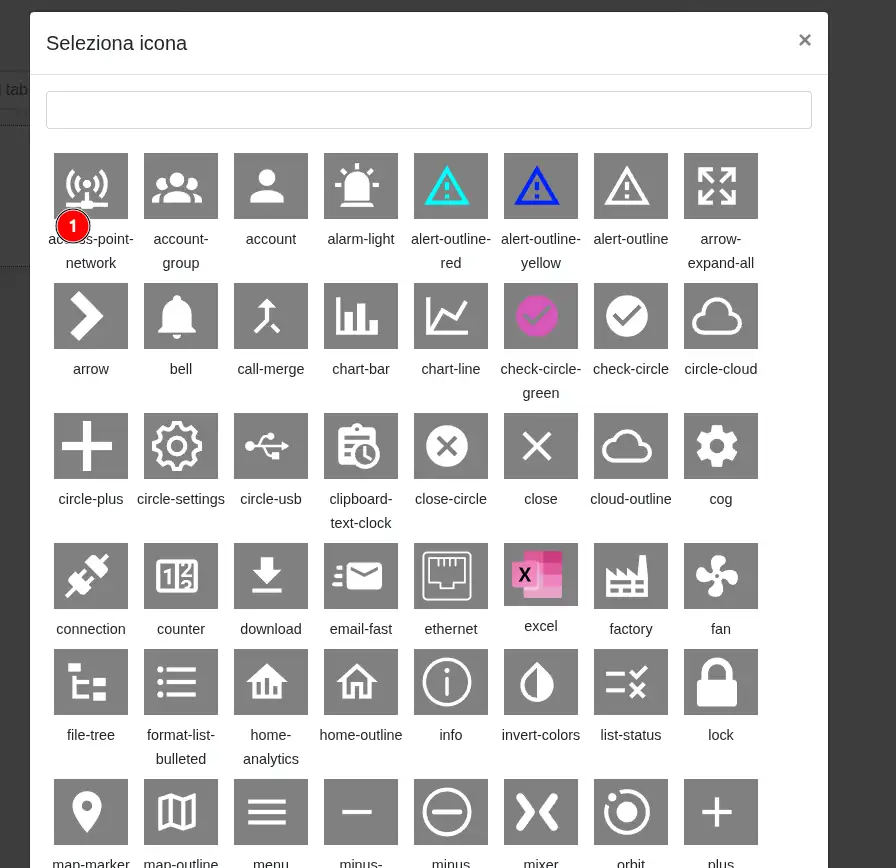
To choose an icon, click Select, then select (1) one of the available symbols. The field at the top lets you search for an icon by name.
Complete the fields, enable Show icon only (1) only if required, and click OK (2) to save the entry.
Adding a widget
Open the required page and click Add new widget (1).

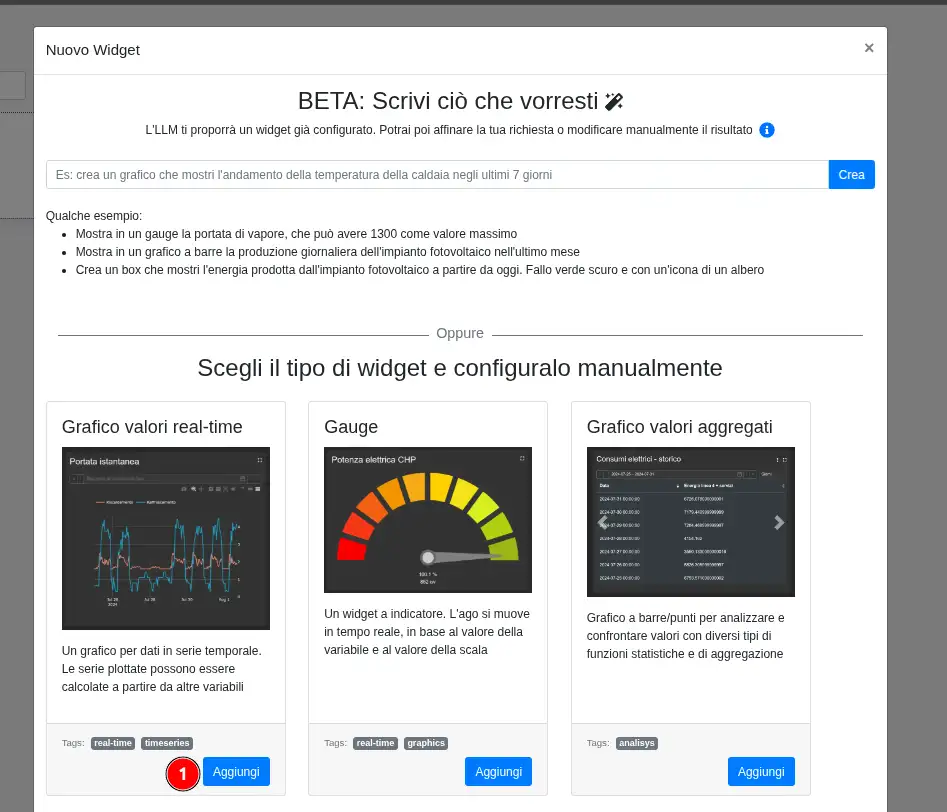
In the New Widget window, you can:
- describe the desired result in natural language and use Create to obtain an automatically proposed configuration; this feature is marked as beta;
- manually choose the widget type and click Add (
1).
Each card includes a preview, a short description, and tags identifying the widget's purpose.
Configuring a time-series chart
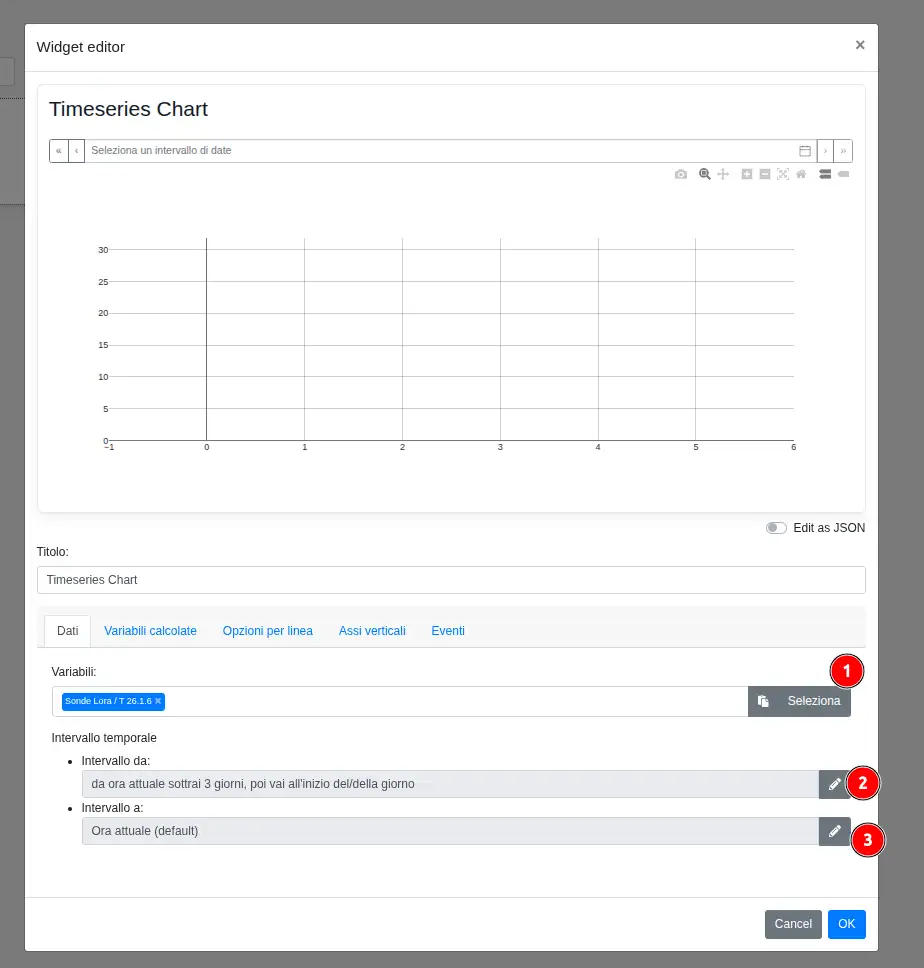
In the Widget editor, enter a title and configure the data. In the time-series chart example:
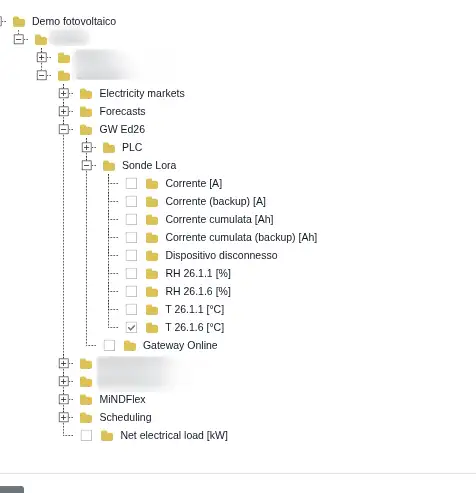
- Select opens the resource tree and lets you choose one or more variables;
- the pencil beside Interval from configures the start of the time range;
- the pencil beside Interval to configures the end of the time range.
The other tabs let you configure calculated variables, line options, vertical axes, and events. The available options vary according to the selected widget type. Click OK to add the widget to the page.
In the resource tree, expand folders and devices until you reach the variables. Select the checkboxes for the variables to display in the widget, then confirm your selection.
Organizing pages
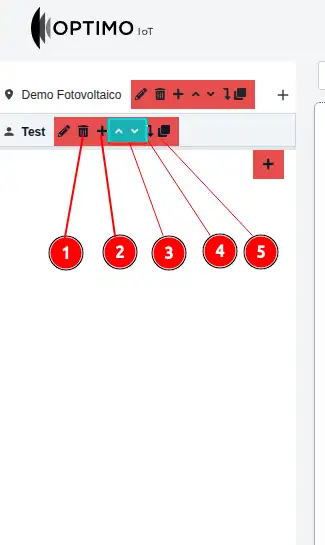
The controls beside each menu entry let you:
- delete the entry;
- add a child entry;
- move the entry up or down in the menu order;
- change the entry's hierarchy level;
- duplicate it.
The pencil, shown before the bin, lets you edit the entry. The available controls depend on the entry's position in the hierarchy.
Editing and arranging widgets
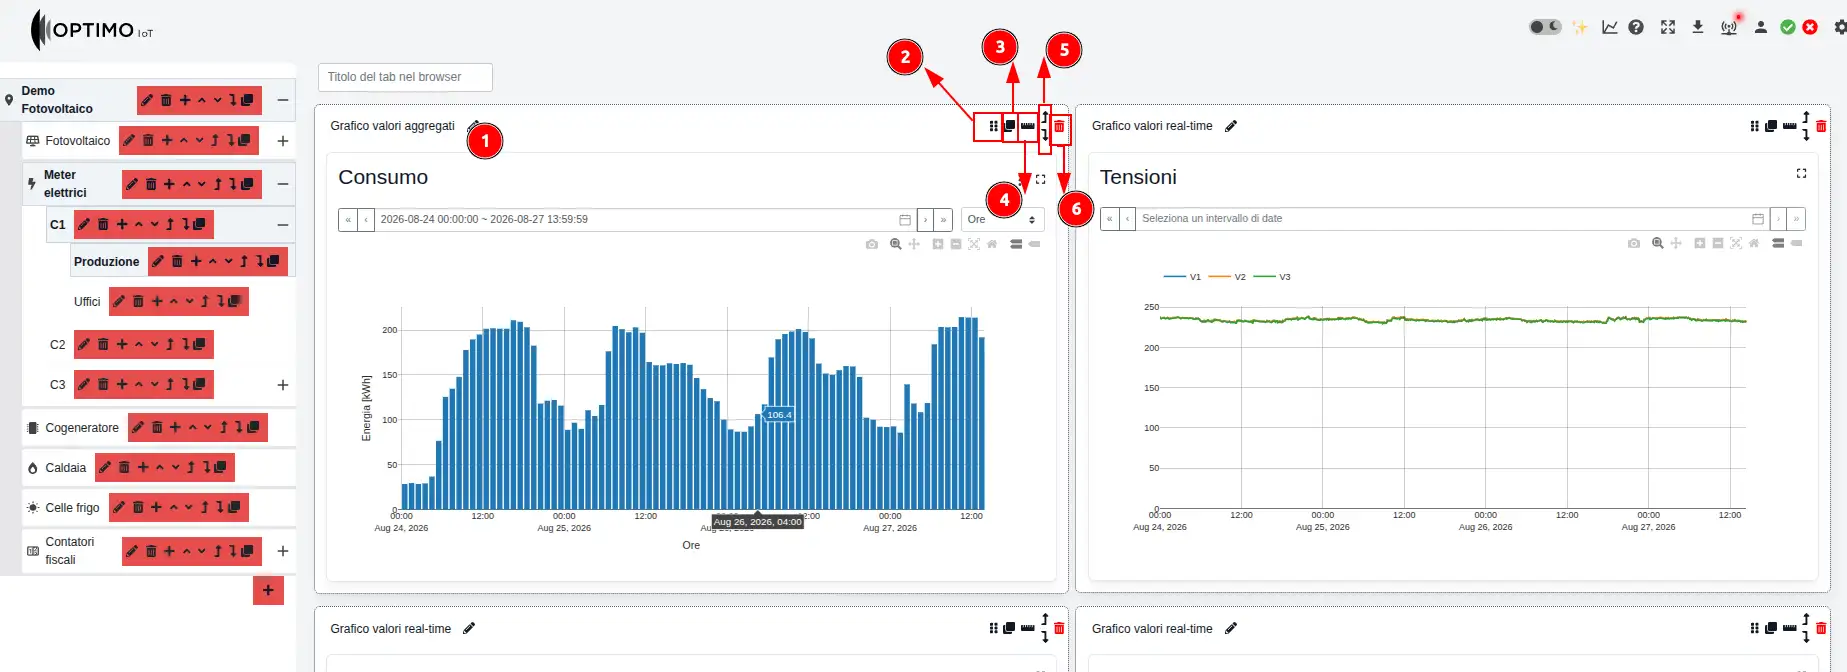
Each widget has controls in its header:
- the pencil beside the widget type opens its configuration;
- the dotted handle lets you drag the widget;
- the overlapping-squares icon duplicates the widget;
- the ruler changes its width;
- the vertical arrows move the widget up or down;
- the bin deletes the widget.
Editing an existing widget
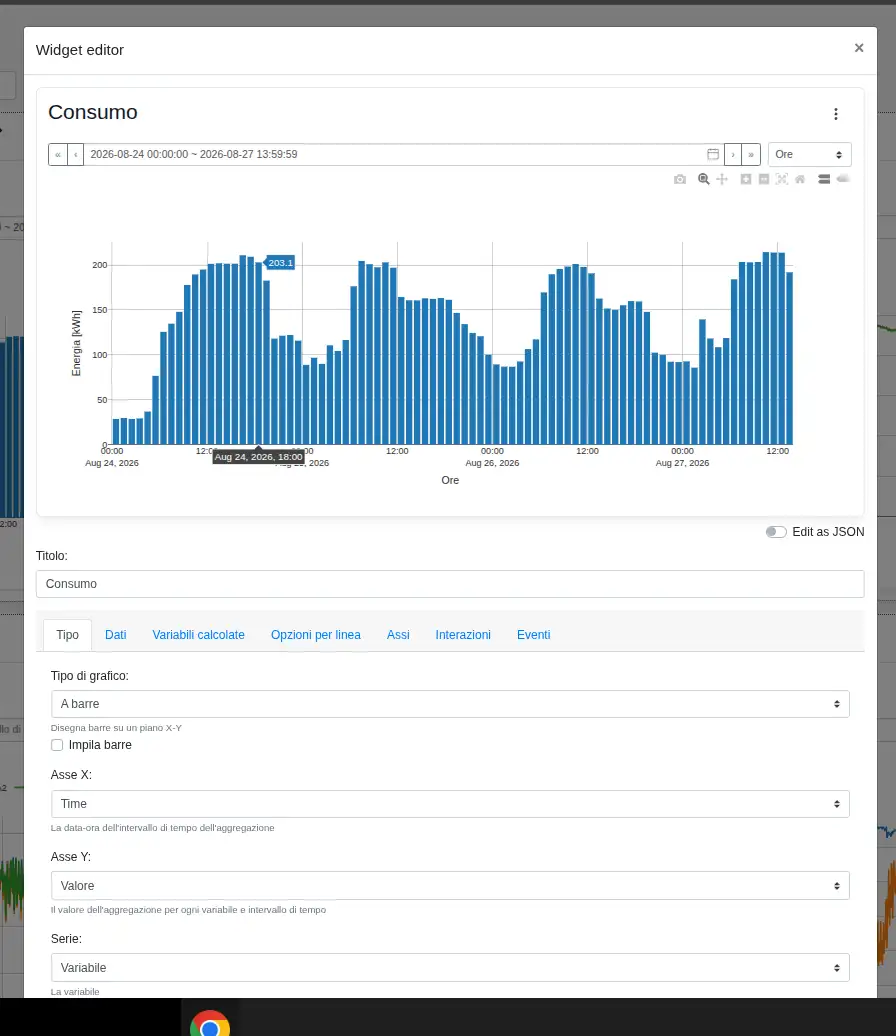
Click the pencil to reopen the Widget editor. You can change the title, chart type, variables, axes, interactions, and events. The tabs and fields vary according to the widget. When finished, click OK.
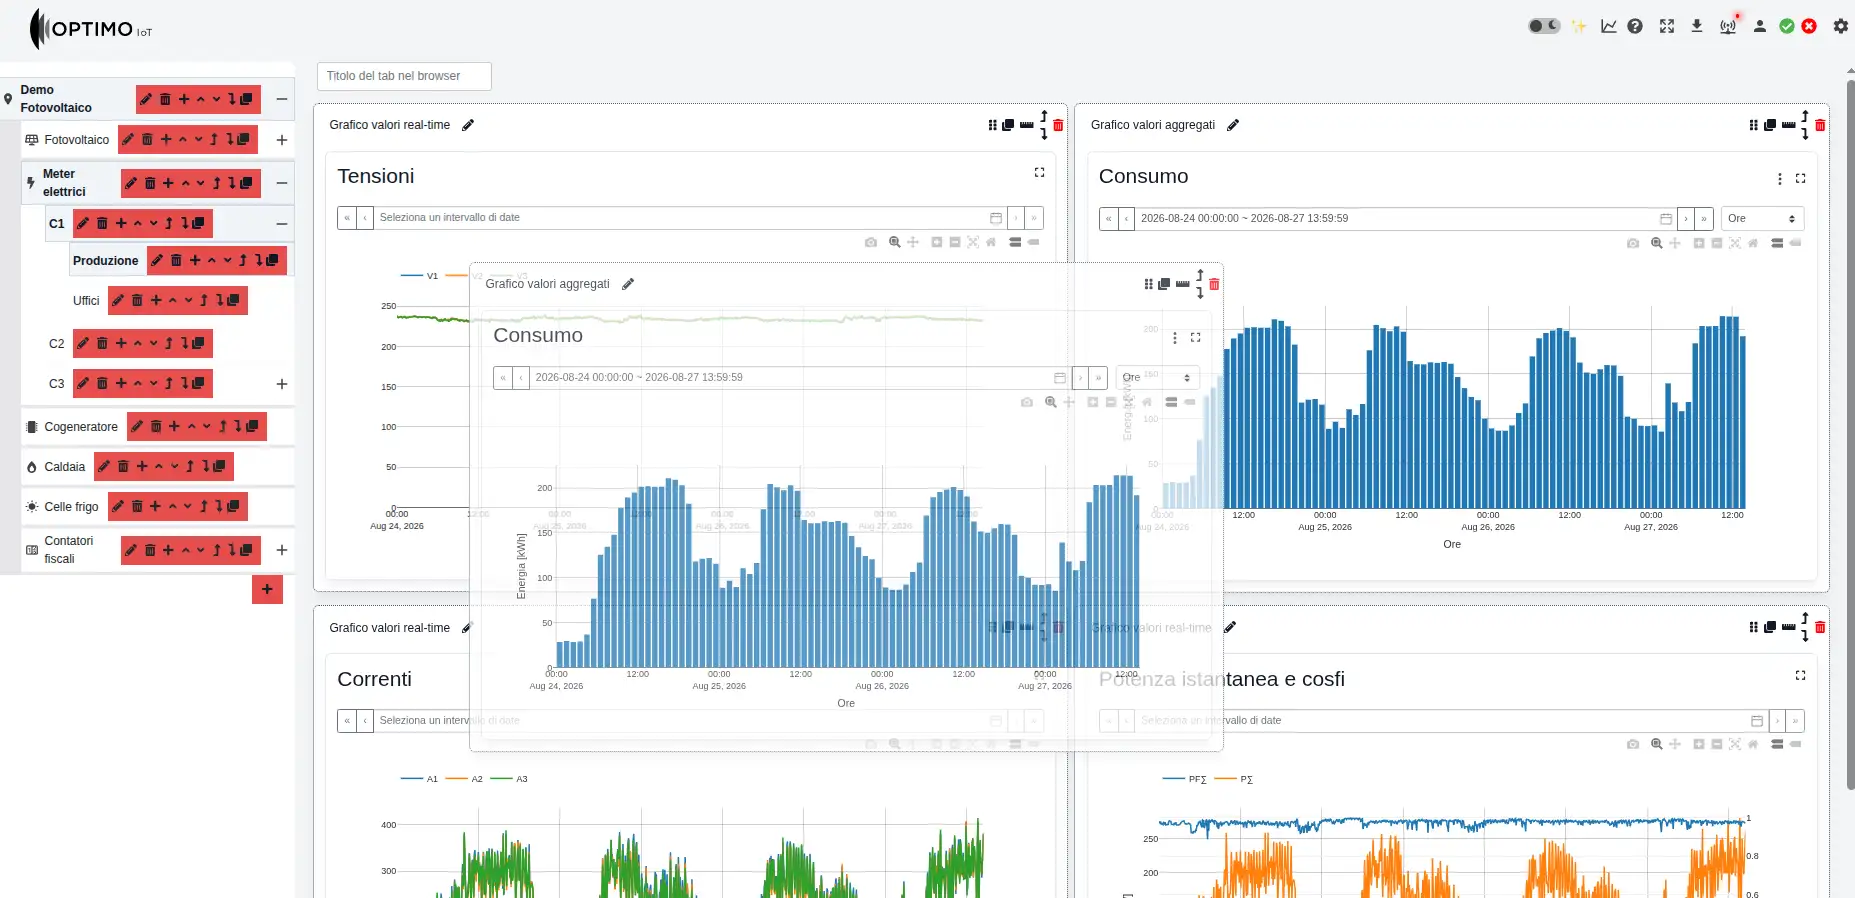
Moving a widget
Drag the widget by its dotted handle and drop it in the required position. While dragging, the translucent preview shows its new location.
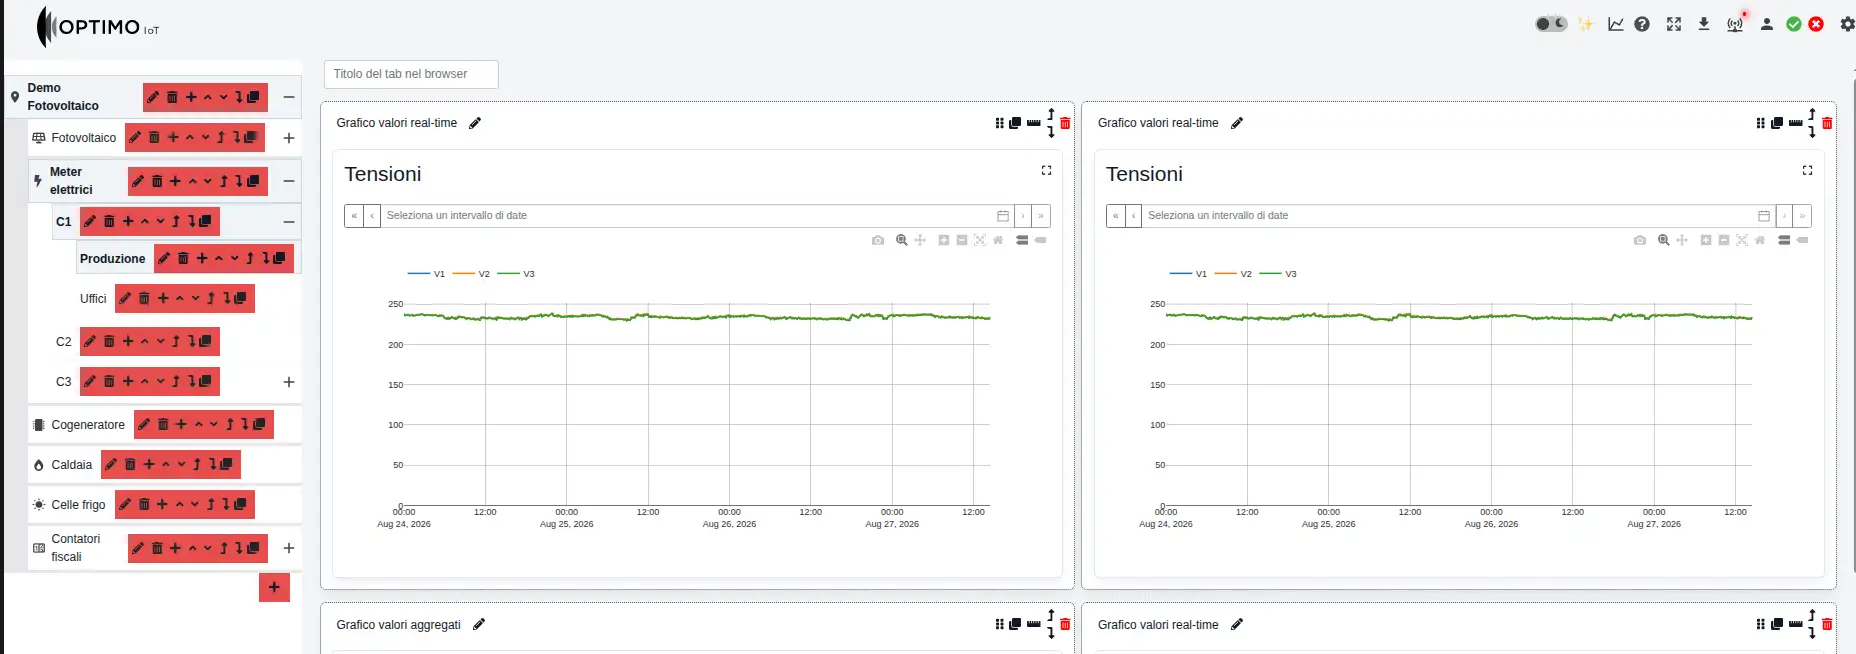
Duplicating a widget
Click the overlapping-squares icon to create a copy of the widget on the same page. The copy keeps the original configuration and can then be edited independently.
Finishing your changes
When the dashboard is ready, use the green check mark in the top bar to confirm the changes. Use the red X to leave edit mode and cancel unconfirmed changes.